Showing posts with label Vegan. Show all posts

3.14.2011

Ravioli with Acorn Squash and Spinach

We received a plethora of squash from our Fall Farm Share, and I find the hard-shelled varieties to be a little intimidating when thinking of ways to use it for dinner...especially dinner for two.  With an entire bowl-full of squash to use (which, until I figured out how to use it, made a lovely Fall centerpiece) I decided to throw it in a pasta.

I cut the acorn squash in half, scooped out all the seeds from the center of the squash, and discarded the seeds.  After stabbing the skin with a knife to allow moisture to escape, I baked the squash halves in the oven flesh-side-down until tender (about 20 minutes).  


We paired the acorn squash with an Arrabbiata sauce, Kalamata olives, spinach, and a pumpkin ravioloi.


Delicious!

What to do with all that produce?

Stir fries are one of the easiest ways to use an abundance of produce, and I love how little you have to cook the vegetables.  With soy sauce, fish sauce, toasted sesame oil, ginger, garlic, and chili powder, you can turn a refrigerator drawer-full of carrots, cabbage, red and green peppers, onions, broccoli, etc. into a great meal!  Don't forget to add the shiitake mushrooms (my favorite)!

1.27.2011

Homemade Apple Sauce

One of my blog readers commented on a previous post about baked apples, mentioning how she makes homemade apple sauce.  I thought that was a brilliant idea!  We get an abundance of apples from our Farm Share at times, and we also buy a lot of local apples throughout the Fall because they are so readily available and delicious.  This is a great alternative to noshing on a raw apple that was so easy and yielded a really delicious dish!

Homemade Apple Sauce

Step 1: Wash, core and chop apples into chunks.  I kept the skin on (it's the most nutritional part!)

Step 2: Heat the apples on the stove, medium heat.

Step 3: Cook the apples until they start to soften.  They'll start to look a little mushy (like above).  Once they reach this consistency, either purée the mixture with a hand blender (I have a Cuisinart immersion blender that I use) or let cool, then transfer to a food processor or blender to purée.

Final Step: Add cinnamon to taste, and voilá!  Delicious homemade apple sauce with no sugar added!

9.30.2010

Salsa Verde (...y Rojo)

I LOVE tomatillos, and we received some in our Farm Share over the summer, but unfortunately in the middle of packing so I couldn't dedicate the cooking resources (spices and pots packed!) to make my favorite salsa verde. Instead I briefly simmered tomatillos with a couple red tomatoes and a red pepper in a pot to create an on-the-go salsa.  It was a good accompaniment to my dinner of callaloo, homemade tortillas, and eggs (can you tell we were using whatever was left in our fridge?)  A random dinner, to say the least; though it actually reminded me a lot of what my sister and I cooked a few times in her apartment in Jamaica (she was there for 2 years with Peace Corps).  I even threw on some Jamaican hot sauce she sent us.  With no AC in late August, I could close my eyes and feel like I was eating dinner with her in Jamaica.


Anyway, I did want to pass along a really great salsa verde recipe, though it's not what is depicted in the picture above.  Tomatillos are such fun little vegetables and salsa verde is just delicious.  This recipe is super easy to prepare and requires no cooking, but you can boil or roast your tomatillos to soften them (though not necessary).  I'm also a sucker for fresh lime and cumin, which I would add at the end of the preparation to taste.  If you're an onion fan, that would make a great addition to the recipe, too.  Enjoy!

Fresh Tomatillo Salsa
(From Gourmet)

Ingredients
1/2 lb small fresh tomatillos, husked and rinsed
1 large garlic clove
1 tbs. chopped fresh serrano chile with seeds, or to taste
2 tbs. chopped cilantro
2 tbs. water

Preparation
Coarsely chop tomatillos, then purée with remaining salsa ingredients and 1/2 teaspoon salt in a blender until smooth.

9.29.2010

Wheat Berry Salad with Currants - Update

Ages ago, I said I would post pictures of the Wheat Berry Salad once I prepared it.  Well, a long time later, here goes!

Aren't currants crazy?  They look like fish eggs; I had never cooked with them before.

The finished product.  You can find the recipe for this dish here.  It was a great summer dish, and it would also be great in the fall with some dried cranberries and apples!

8.12.2010

Wheat Berry Salad with Currants

I have had this post in my "drafts" folder for a week or so now, and I apologize.  After we received currants last week and wheat berries a couple weeks before, I remembered a recipe I previously posted for a Wheat Berry Salad a friend gave to me.  I'm waiting for a chance to go buy peaches and sunflower seeds--and as soon as I do I will cook up this salad, take photos, and add the pictures to this post.  In the meantime, please enjoy this recipe if you find yourself with currants and wheat berries and are looking for a way to use them.  Sounds so good!


Wheat Berry Salad
(Recipe compliments of one of my best friends.  This would be a great addition to a green lettuce salad.)

Ingredients
1.5 c. wheat berries
Seasalt
4-5 scallions, chopped
1 c. chopped peaches (substitute apples in the Fall/Winter)
1/2 c. currants
1/4 c. toasted sunflower seeds
Juice of 1 lime
3 tbs. sesame oil

Preparation
Cook wheat berries, then in large bowl, combine cooked berries with scallions, apples, currants, and toasted sunflower seeds.  Toss with lime juice, toasted sesame oil, and pinch of salt.  Serve room temperature or chilled.


Cooking Wheat Berries
(These directions are for 3/4 c. wheat berries.)

Place wheat berries in heavy medium saucepan.  Add enough cold water to saucepan to cover wheat berries by 3 inches.  Let stand overnight.  Drain.

Bring 4 c. water, wheat berries and 3/4 tsp. salt to boil in same saucepan.  Reduce heat, cover and simmer until wheat berries are tender but still slightly firm to bite, about 1 hour.  Drain.

Roasted Summer Vegetables

With the ABUNDANCE of Farm Share vegetables we have gotten in recent boxes and little time we've had in the kitchen lately, I'v been at a loss at times to get through all that we have.  Not a problem, especially when I have friends to give some produce to, like my BF who loves beets (and I love giving them to her!)

A couple weeks ago we had a ton of summer squash, Patty Pan squash, zucchini, potatoes, and a couple carrots I really wanted to use.  So, I simply cut them all on the bias, about 1/4-1/2 inch thick slices, tossed them in olive oil and and pepper, and sprigs of thyme, and roasted them in the oven.


I set the oven to bake at about 400 and they roasted for I think about 45 minutes.  They came out still crunchy but just cooked enough to bring out the vegetables' sweetness.  A very easy, quick way to use a large amount of produce!  Roasted vegetables could stand alone as a meal (on a bed of couscous, perhaps?) or works wonderfully as a side (with grilled chicken or fish?).  Enjoy your veggies!

7.25.2010

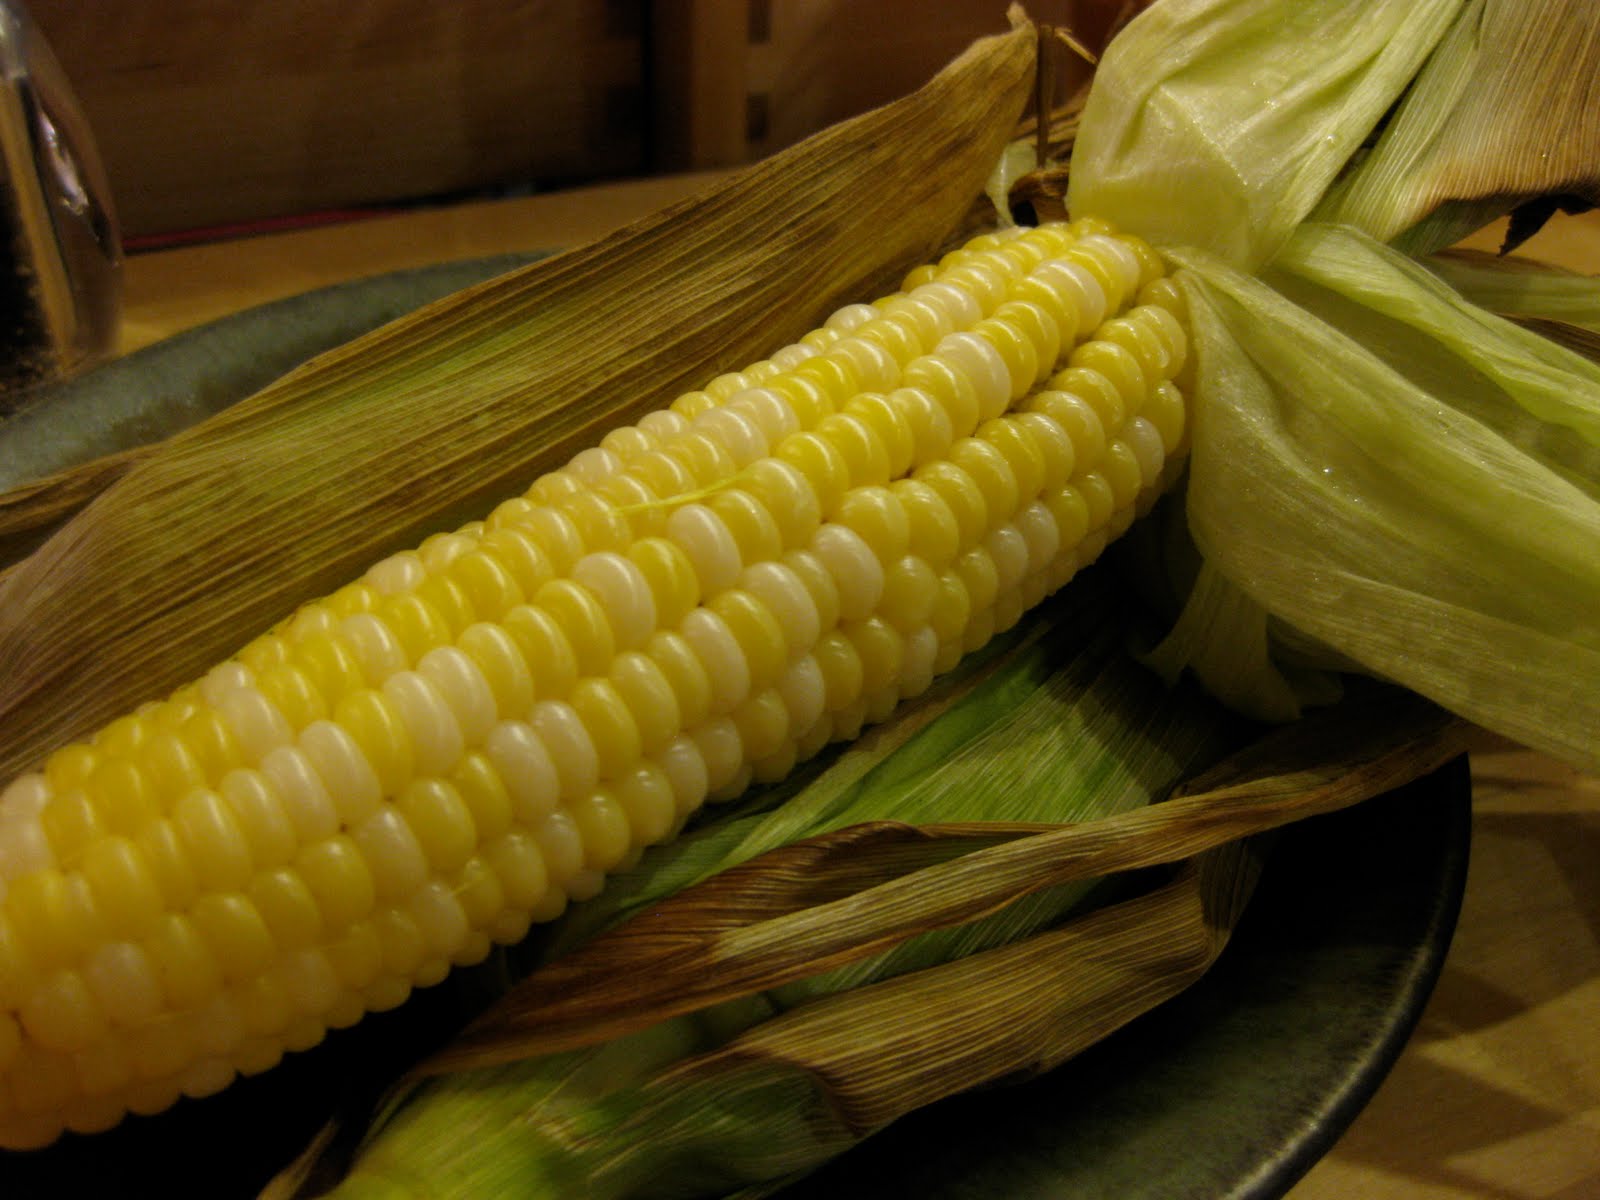
Grilled Corn Tutorial

Alright--I'm going to share a little tip I found.  There's grilled corn, and then there's grilled corn.  I saw this technique last summer when I was searching for a way to cook corn, and I'm pretty sure I should credit this to Bobby Flay.  We all know this man knows grilling.

So many times when we are served grilled corn, it's great--has good flavor, gets the char marks from the grill, but it can be a little--I think the best word is--deflated.  No longer.  Follow these steps, and you will be sure to have perfect grilled corn that is plump and juicy.


Step 1: peel back husks of corn; do not remove them from the ear of the corn entirely.


Step 2: Once you reach the ear of the corn, remove the silk and discard.


Step 3: place the husks of the corn back over the ear of the corn so that it is covered  completely.  In a large pot of cold water, soak the husk-covered corn in water for at least 20 minutes.


Step 4: After the corn has soaked for at least 20 minutes, place the corn on a hot grill as-is, with the husks still covering the corn kernels.


Step 5: Cook corn for approximately 30-35 minutes over indirect heat, depending on the heat of the grill, until done.   


Step 6: Serve!  The corn should be so juicy and flavorful, you may not even want (or need) to serve it with butter, salt and pepper.


Enjoy!!

Quick-Cooked Callaloo

We received callaloo in our Farm Share a few weeks ago, and I wanted to cook it up a little differently than I've had served to me: slow cooked.  It's summer, it's hot, we don't have AC, so the less amount of time I can keep the oven on, the better.  This recipe was inspired by a Gourmet recipe for Brazilian Collard Greens (found on Epicurious.com and mentioned previously on my blog).


What I did was very simple: After rinsing the callaloo leaves and cutting off the stems at the base of the leaf, I rolled several leaves into a cigar and cut the leaves into thin strips.  In a large sauté pan I heated some olive oil and added three cloves of garlic, chopped.  I then added the chopped callaloo, added a touch of salt and pepper, and sautéed until they turned a bright green.  That was it!  And I was pleasantly surprised by the vibrant, non-bitter flavor of the callaloo.  We served this as a side with grilled chicken and corn.

Grilled Panzanella Salad

WOW.  This meal was great!  Panzanella is an Italian dish that is popular in the summer months.  It consists of sliced bread and tomatoes,  flavored with basil, olive oil, and vinegar, and often salt and pepper.  The bread used should be a day to a week old; in other words, hardened and crunchy--what some people would consider "stale," which is why it's often known as the "leftover salad."


Oh, but it is delicious!  This is probably one of my husband's and my favorite summer meals using our Farm Share produce to-date.

Grilled Panzanella Salad

Ingredients 
(serving 2)
Salad
Slices of Tuscan bread, thickly sliced
1 zucchini, thickly sliced
1-2 summer squash, thickly sliced
1-2 tomatoes, thickly sliced

Dressing
1 shallot, finely chopped
About 1/4 c. olive oil
About 2-3 tbp red wine vinegar
(I don't use measurements very often when I throw things together, so you may want to add proportions of the dressing cautiously until you find the flavor you like best--the measurements above are estimates to what I used)

Preparation
On hot grill, place bread, zucchini, and squash slices.  On cooler portions of the grill place the tomato slices.  Once all items begin to char and show grill marks, remove.  Rest bread slice on bottom of plate and top with grilled tomato, zucchini, and squash.  Drizzle dressing on top, and serve with chopped basil or oregano.

5.18.2010

Roasted Eggplant Spread

This recipe was recommended to me by a friend in Atlanta, who has a great design blog of her own...check it out!  As Taylor mentions on her blog, she loves Barefoot Contessa.  We had cable for a while, then canceled it, and will be getting it back for the World Cup.  So, maybe with more time this Summer I can plug into her show and discover more of her recipes, too!

This recipe was quick and easy, and a great way to use eggplant (which is tricky to cook successfully sometimes)!


Roasted Eggplant Spread 
(From Barefoot Contessa Cookbook and Taylor's blog)

Ingredients
1 medium eggplant
2 red bell peppers
1 sweet onion (original recipe calls for a red onion)
2 garlic cloves
3 tbs. olive oil
1/2 tsp. ground pepper
1 tbs. tomato paste


Preparation
Preheat oven to 400 degrees.  Cut the eggplant, bell pepper, and onion into 1-inch cubes.  Toss them in a large bowl with garlic, olive oil, salt, and pepper.  Spread them on a baking sheet.  Roast for 45 minutes until the vegetables are lightly browned and soft, tossing once during cooking.  Cool slightly.

Place the vegetables in a food processor fitted with a steel blade, add tomato paste and pulse 3-4 times to blend.  Taste for salt and pepper.  * I like my dips to have a little kick, so to this I added some cumin and cayenne.

4.15.2010

Blanched Greens with Mustard Vinaigrette

Spring time is here (sort of, it's still chilly outside) and our Farm Share is showing more signs of Summer produce (see my next post!).  However, despite the arrival of new produce we still face the challenge of cooking and consuming copious amounts of greens.  The challenge is not in consuming the greens (we love them--they are always so flavorful and of course are so healthy!) but in switching up recipes and introducing different flavors to the weekly rotation.  Doing that successfully with dark leafy greens can be a challenge.

I previously posted a Swiss chard with olives and lemon recipe that was a nice change.  Today I'm posting an easy dish using the mustard vinaigrette recipe I posted before.

I started with red Russian kale...

...and turnip greens.

After washing and cutting the stems off both varieties, I threw the leaves into a pot of boiled water until tender, about 5 minutes.


Directly after boiling I submersed all the leaves in a bowl of ice water for just a minute or so.  I then placed the greens in a colander and let the water drain from the greens for about 30 minutes.  I also patted the leaves dry with a towel (they tend to hold a lot of water, and the dryer the greens, the better the mustard vinaigrette will coat them).  Finally, I tossed the greens with the mustard vinaigrette (about 1/4-1/2 c. total dressing, to taste and proportional to the number of greens prepared) and served cold.

4.12.2010

Black Bean Salad

Tonight we finished up our big head of green leaf lettuce from last week's Farm Share arrival.  We threw together some different ingredients and in under 20 minutes had yet another great salad.  The next couple "recipes" aren't technically recipes, I suppose--I don't use measuring spoons when I throw these dishes together--but regardless they turn out great every time!  I don't have a picture of the meal we enjoyed, but we threw black beans, a little bit of salsa, and guacamole on top of a large bed of lettuce.  We served with lightly grilled tortillas...delicious!


Black Beans

Ingredients
1 can black beans
1/4 red onion, chopped
1 garlic clove, minced
~1/2 to 1 tbs. cumin
~1 tsp. cayenne pepper
~1 tsp. hot red pepper, chopped
1/2 lime, squeezed for juice

Preparation
Stir all ingredients together over medium heat for about 10-15 minutes.


Guacamole

Ingredients
2 avocados, peeled and chopped
1 tomato, diced
1/2 lemon, squeezed for juice
~ 1 to 1 1/2 tbs. cumin
~ 1 1/4 tsp. cayenne pepper
2 garlic cloves, minced
Salt and pepper, to taste
1/4 red onion, diced (optional)  I tend not to use red onion because raw onions make my stomach hurt, and I personally think the taste of the avocado comes out better with no onion.

Preparation
Put all ingredients in bowl, and using kitchen tool (I use a whisk) mash the avocado so there are chunks still in tact but the ingredients are all mixed.  Serve immediately.

4.10.2010

Swiss Chard with Olives and Lemon

Friday night meal, post 3.

Look how gorgeous this rainbow chard is!!


This next picture was snapped as my husband chopped the leaves.  So pretty!


I wanted to do something a little different than what we have done in the past with Swiss chard (e.g., something other than sautéing it in olive oil and garlic).  So I found a recipe using olives and lemon.  The flavors ended up working really well with the risotto: they were a nice, salty compliment to the creamy dish.

Swiss Chard with Olives and Lemon
(from Bon Appétit)

Ingredients
3 large bunches Swiss chard (about 2 1/4 lbs. total)
5 tbs. extra-virgin olive oil, divided
1/3 c. quartered pitted oil-cured black olives (2-3 ounces)
2 garlic cloves, crushed
1 tbs. fresh lemon juice

Preparation
Cut stem from center of each chard leaf.  Slice stems crosswise into 1/4-inch pieces; place in medium bowl.  Cut leaves crosswise into 1 1/2-inch-wide strips.

Bring large pot of water to boil; salt generously.  Add chard stems; cook until just tender, 3-4 minutes.  Add chard leaves.  Cook until just tender, stirring occasionally, about 2 minutes.  Drain in large collander, pressing out any water.  Note: this can be made 2 hours ahead.  Let stand in colander at room temperature.

Heat 4 tbs. oil in heavy large skillet over medium heat.  Add olives and garlic.  Sauté until fragrant, about 2 minutes.  Add chard and chard stems.  Toss until heated through and any remaining water evaporates, about 4 minutes.  Mix in lemon juice and remaining 1 tbs. oil; season to taste with salt and pepper.  Transfer to bowl and serve.

Here is how the Friday night meal turned out:


The chard was delicious with the risotto, and the parsnips and carrots were like dessert (sweet and buttery).  Thank you, Farm Share, for this delicious meal!

4.09.2010

Simple Sautéed Zucchini

Sometimes it's nice just to throw things together without using a recipe!  Last night we cooked up two of our zucchinis from our Farm Share.  We simply sliced the zucchini diagonal-wise and sautéed them in a little olive oil and salt and pepper.


We served this with some lightly breaded baked flounder and mango salsa.  Delicious!

3.28.2010

Loads of Grapefruit

Make grapefruit sorbet!

* Update since posting: we tried this last night and it was AMAZING!!

Gingered Grapefruit Sorbet
(From Gourmet)

Ingredients:
3 c. strained fresh grapefruit juice (8 grapefruit squeezed out a little over 3 c. juice)
3/4 c. sugar (I only used 1/2 c.)
1 tbs. grated fresh ginger
2 or 3 drops Angostura bitters, or to taste

Preparation:
In a small saucepan combine 1 c. of the grapefruit juice, the sugar, and the ginger and boil the mixture, stirring until the sugar is dissolved.  Remove the pan from the heat and let the mixture cool completely.  Pour the mixture through a fine sieve into a bowl or large glass measure, stir in the remaining 2 c. grapefruit juice and the bitters, and chill the mixture, covered, until it is cold.  Freeze the mixture in an ice-cream freezer according to the manufacturer's instructions.  (User reviews noted that if you don't have an ice-cream freezer, which we don't, you can freeze the sorbet as-is after mixing all ingredients.  Then, when ready to serve, run through a food processor.)

Sweet Beet Muffins

This is not story of a wolf in sheep's clothing.  You may know from one of my previous posts that I have tried several different recipes for beets in an attempt to convince myself I could like them, however I continuously found that I simply did not.  My dilemma this week was looking at the three beets from previous Farm Share boxes staring at me in the refrigerator and wanting to cook them, but dreading the  process of doing so.  

One morning, on my walk to the T, I was reminded of my favorite coffee shop in Nashville (Fido in Hillsboro Village, love!) and the creative, delicious muffins they had.  It was then I was struck with an "ah-ha!" moment--beet muffins!  Fido had a beet muffin at one time that their baker was experimenting with--I tried it and liked it, a big moment for me.  Hence how I became inspired to turn these beets that were staring me down into a delicious baked good.

These turned out really well, and I used all the beets we had left!  In addition to the beets from our Farm Share, I used some of the barley flour we received in our Farm Share this week.

Enjoy!


Sweet Beet Muffins
(Recipe adapted from a post on this blog)

Ingredients
1 c. beets
1 c. whole wheat flour (I used 1/2 c. whole wheat flour and 1/2 c. barley flour)
1/2 c. all purpose flour
1 1/2 c. + 2 tbs. brown sugar
1/2 c. vegetable oil
1/2 c. soy milk
1 tsp. baking powder
1 tsp. baking soda
1 tsp. pure vanilla extract
1/4 tsp. cinnamon
1/4 tsp. ginger

Preparation
Preheat oven to 350.  Roast beets in oven (wrap washed beets in foil and place on middle rack, 350 degrees for 30-45 minutes, or until soft).  Once beets are cooled, peel and shred (you can use a food processor to chop or cheese grater to grate beets).  Mix all dry and wet ingredients separately, then combine, folding beet mixture into the dry ingredients.  Bake for 15-20 minutes, or until a toothpick comes out clean from center of muffin.

After beets were roasted and peeled, I used my mini food processor to chop the beets.

The beets before adding the wet ingredients.  They really are gorgeous vegetables.

Vibrant purple batter!

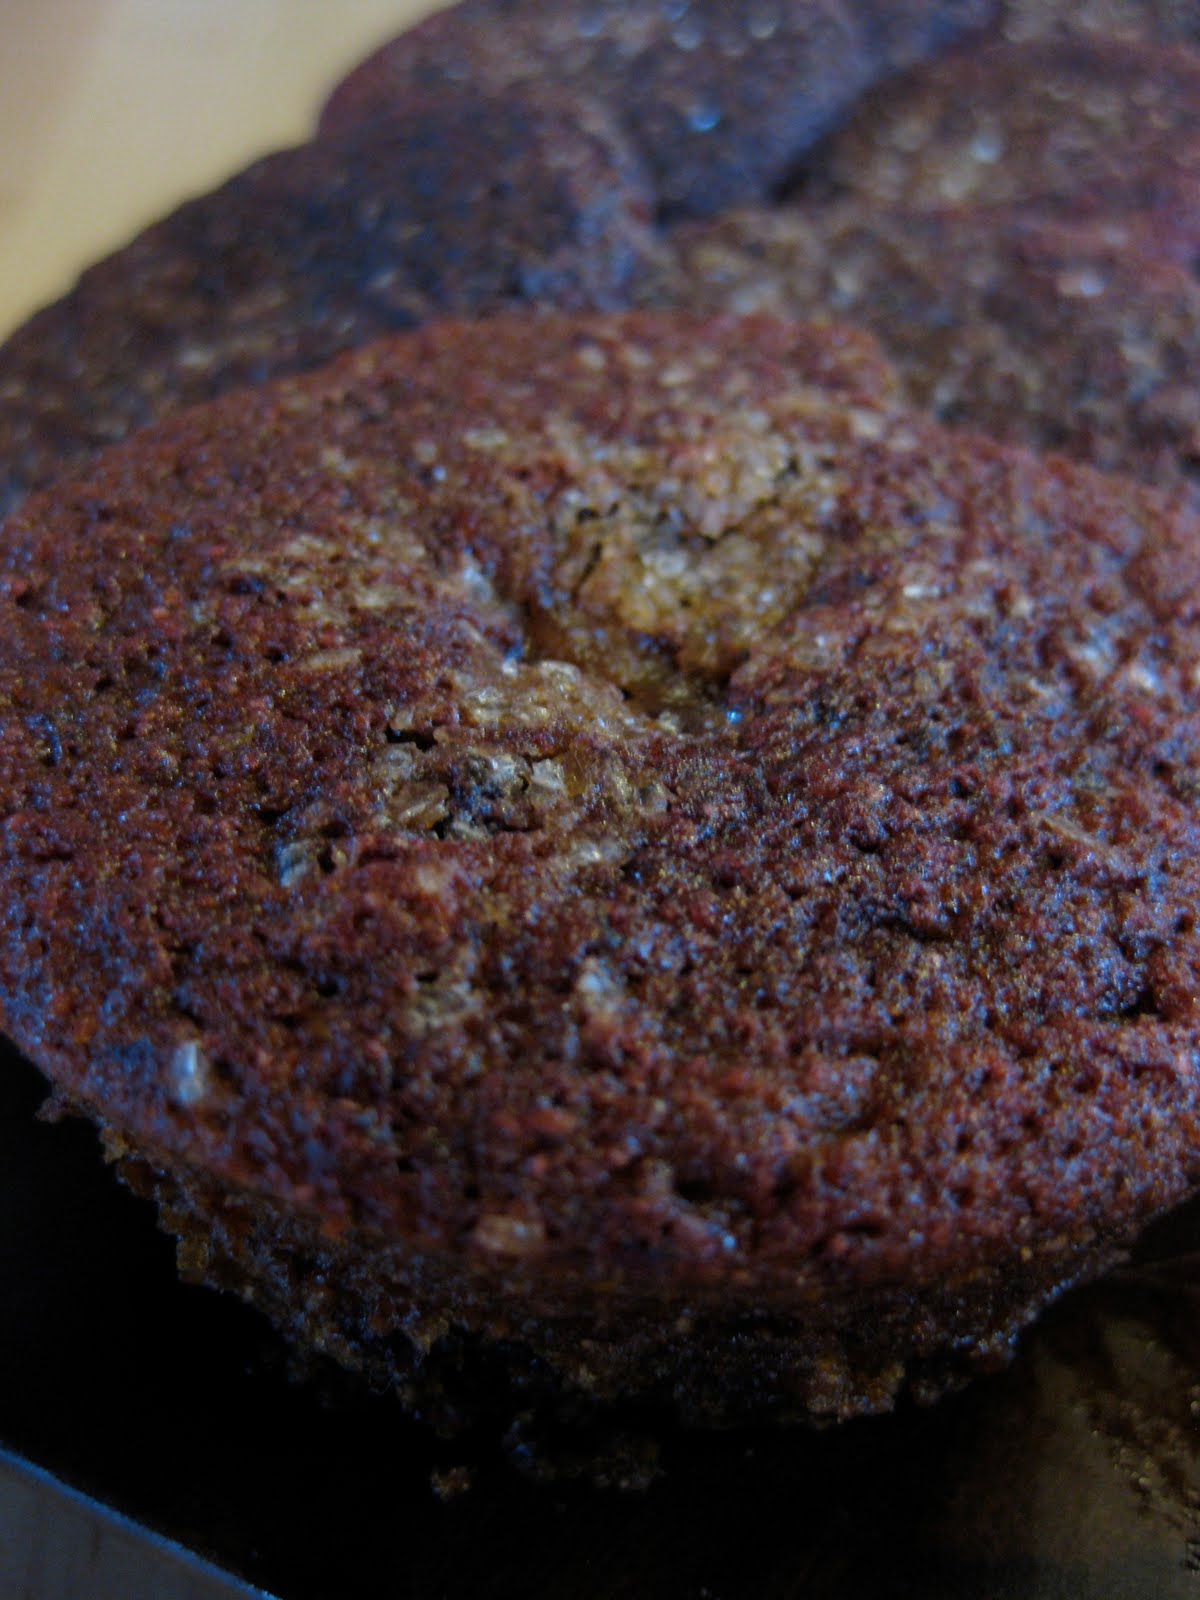
The finished product.

3.27.2010

Risotto with Kale

Risotto is such a delicious, satisfying, and diverse dish--I don't make it nearly often enough.  Last night we got home late, were starving, and wanted to use some of our dark leafy greens but do something other than braise or sauté them.  So, we threw them in a risotto.

We didn't follow a recipe, but you can find something similar to what we did here.

What's nice about risotto is you can simply follow the directions on the Arborio rice box but add different ingredients according to what you're feeling: seafood (my favorite!), mushrooms, butternut squash, asparagus, sausage...the list goes on.  For our dish, we sautéed some onions and garlic in olive oil.  I then added some vegetarian italian sausage that we had.  After that cooked for a while, we added the risotto, let that sauté briefly with the onion and sausage, then started adding vegetable broth.  As the Arborio rice soaked up the vegetable broth, we added more, finally throwing in the kale and tomatoes.  I threw in some oregano, ground pepper, and red pepper flakes, and the dish was done in about 30-40 minutes.

Sautéing in our risotto pan.

The finished product!


3.24.2010

Vegetarian and Vegan Labels

Now Farm Share Eating will label recipes as "vegetarian" or "vegan" if they fall under one of those categories.  As you can probably tell, I am not personally a vegetarian or vegan.  However, we tend to eat a lot vegetarian meals, and since most of my posts are about what we do with our Farm Share produce, there will be a lot of recipes that fall under these two categories.

As a disclaimer, I want to clarify that these two labels are defined as follows:
  • Vegetarian recipes are those that contain no meat products, including fish.  They may contain egg and dairy, however.
  • Vegan recipes are those that contain no animal products or byproducts.
If for any reason I mistakenly mislabel a recipe as vegan or vegetarian and it's not, please let me know!  I don't want to make mistakes when it comes to this. 

Also, when there are vegan substitutes that I know of in cooking and baking, I may reference them along with the non-vegan recipe, so just be aware of that as you read through the postings.

Thanks!

3.22.2010

Root Vegetable Curry

What to do with a slew of random vegetables that must be eaten before our next Farm Share arrives 2 days from now?  This was the challenge we were presented with tonight.  We wanted something different from our usual fare that would use up a lot of vegetables and make good leftovers for the week to come (leftovers are key for to-go lunches during the week!).

Here is what we were working with: green Swiss chard, a huge turnip, celery root (or celeriac), carrots, and parsnips.  We did not follow a recipe for this: we just chopped up all the veggies, threw them in our dutch oven with vegetable broth and curry, and made vegetable-laden curry dish.  I don't think you can really go wrong with curry!  I have to thank one of my readers for their suggestion of using turnips in a curry--that was the inspiration for throwing all these vegetables together and making this dish.

ALL the veggies chopped and ready to go.

We used a dutch oven simply to fit all the vegetables we had to cook!

We first heated some olive oil in our dutch oven and added onion and garlic.  Once the onion was translucent, we added the harder vegetables (carrots and parsnips), along with minced garlic and minced hot pepper.  Then we added curry powder and vegetable broth.  Once these had time to get a little cooked through, we added the turnip, followed by more broth and curry powder.  We let this cook for about 5 minutes.  Then we added the celery root and chard, along with more broth and curry.  We cooked until the vegetables were tender and they had taken on the flavor of the curry, all-in-all about 15-20 minutes total.  I would estimate that I used about 6 tsp. curry all together, perhaps a little more.  I also shook in some cayenne pepper, to bump up the heat a little.


Served on a bed of Basmati rice, this was a nice change from how we often use our produce, and a dish that used FIVE different types of vegetables from our Farm Share!